When [Taylor Burley] first opened up the cartridge for The Legend of Zelda: Oracle of Seasons, it certainly didn’t look like it had been dunked in corrosive orange juice. But looks can be deceiving, and while the game’s owner certainly did an admirable job of cleaning up the surface of the PCB, the cartridge was no longer functional. Clearly, this was a sticky situation.
After removing all of the components from the PCB, [Taylor] was quickly able to piece together what had happened. Despite the vigorous cleaning the game received after the spill, juice had found its way under each IC on the board. Left to sit in these nooks and crannies for who knows how long, the juice started to eat away at the traces on the PCB. Getting the game back up and running would naturally require considerable board repairs, but they don’t call him Solderking for nothing.
Corrosion lurking under each chip.
” data-medium-file=”https://hackaday.com/wp-content/uploads/2021/10/juicepcb_detail.jpg?w=400″ data-large-file=”https://hackaday.com/wp-content/uploads/2021/10/juicepcb_detail.jpg?w=764″ loading=”lazy” src=”https://hackaday.com/wp-content/uploads/2021/10/juicepcb_detail.jpg?w=400″ alt=”” width=”400″ height=”327″ srcset=”https://hackaday.com/wp-content/uploads/2021/10/juicepcb_detail.jpg 873w, https://hackaday.com/wp-content/uploads/2021/10/juicepcb_detail.jpg?resize=250,204 250w, https://hackaday.com/wp-content/uploads/2021/10/juicepcb_detail.jpg?resize=400,327 400w, https://hackaday.com/wp-content/uploads/2021/10/juicepcb_detail.jpg?resize=764,625 764w” sizes=”(max-width: 400px) 100vw, 400px”>
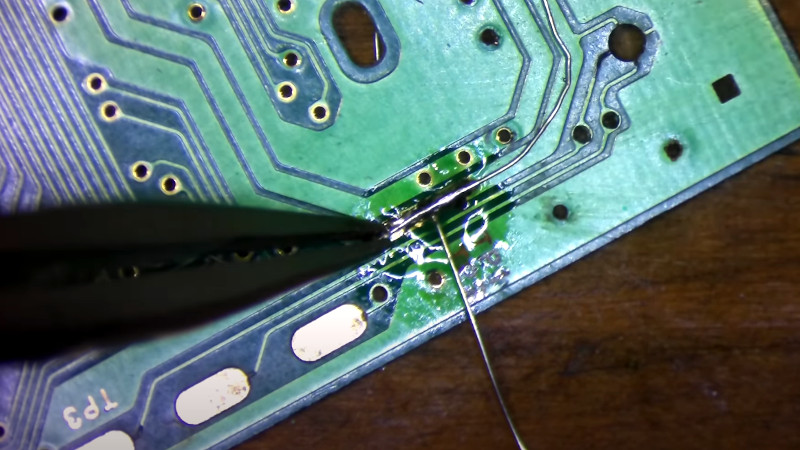
In the video below, you can see [Taylor] methodically scraping away the corrosion on the board before he starts recreating damaged connections with solid 30 gauge wire. Using tweezers and viewing the action through a digital microscope, he deftly bends the wire around to fit the shapes of the original traces and tacks the new conductors down with solder. He even goes ahead and repairs the traces that go to various test points on the cartridge; it’s a completely unnecessary extravagance, but we’re certainly not complaining. There’s a relaxing quality to watching him work, so we were in no rush to see his latest video end.
After fixing the board back up, he replaces all the components and takes it for a test drive on an original Game Boy Color. Confirming that Link’s 2001 outing is working as expected, he finishes the job with a few coats of spray-on conformal coating. With any luck, the next time this particular cartridge has to go face-to-face with some spilled juice, it will roll right off.
This isn’t the first time we’ve seen [Taylor] laboriously rebuild a Game Boy cartridge, and it certainly isn’t the first time we’ve seen him pull off some particularly impressive feats of soldering, either. His work always reminds us that patience and a steady hand can really do wonders.
Source:: Hackaday

