I’ve always been fascinated by AI and machine learning. Google TensorFlow offers tutorials and has been on my ‘to-learn’ list since it was first released, although I always seem to neglect it in favor of the shiniest new embedded platform.
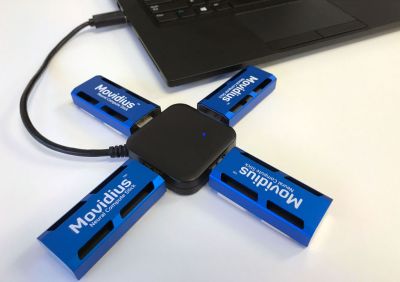
Last July, I took note when Intel released the Neural Compute Stick. It looked like an oversized USB stick, and acted as an accelerator for local AI applications, especially machine vision. I thought it was a pretty neat idea: it allowed me to test out AI applications on embedded systems at a power cost of about 1W. It requires pre-trained models, but there are enough of them available now to do some interesting things.
I wasn’t convinced I would get great performance out of it, and forgot about it until last November when they released an improved version. Unambiguously named the ‘Neural Compute Stick 2′ (NCS2), it was reasonably priced and promised a 6-8x performance increase over the last model, so I decided to give it a try to see how well it worked.
I took a few days off work around Christmas to set up Intel’s OpenVino Toolkit on my laptop. The installation script provided by Intel wasn’t particularly user-friendly, but it worked well enough and included several example applications I could use to test performance. I found that face detection was possible with my webcam in near real-time (something like 19 FPS), and pose detection at about 3 FPS. So in accordance with the holiday spirit, it knows when I am sleeping, and knows when I’m awake.
That was promising, but the NCS2 was marketed as allowing AI processing on edge computing devices. I set about installing it on the Raspberry Pi 3 Model B+ and compiling the application samples to see if it worked better than previous methods. This turned out to be more difficult than I expected, and the main goal of this article is to share the process I followed and save some of you a little frustration.
First off, Intel provides a separate install process for the Raspberry Pi. The normal installer won’t work (I tried). Very generally, there are 3 steps to getting the NCS2 running with some application samples: Initial configuration of the Raspberry Pi, installing OpenVino, and finally compiling some application samples. The last step will take 3+ hours and some will fail, pace yourself accordingly. If you’re not installing it right this moment, it’s still worth your time to read through the other examples section below to get a feel for what is possible.
Preparing the Raspberry Pi
First, download Noobs, unzip to a microSD card (I used 16GB), and boot the Raspberry Pi off it. Install the default graphical environment, connect to the Internet, and update all software on the device. When done, open a terminal and run sudo raspi-config. Select interfaces→enable camera. Shut down, remove power, plug in your camera, and boot …read more
Source:: Hackaday

