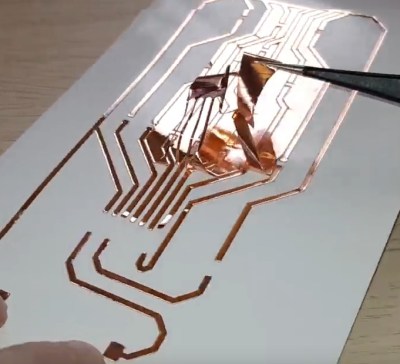
This tip for creating glass substrate circuit boards at home might hew a bit closer to arts and crafts than the traditional Hackaday post, but the final results of the method demonstrated by [Heliox] in her recent video are simply too gorgeous to ignore. The video is in French, but between YouTube’s attempted automatic translation and the formidable mental powers of our beloved readers, we don’t think it will be too hard for you to follow along after the break.
The short version is that [Heliox] loads her Silhouette Cameo, a computer-controlled cutting machine generally used for paper and vinyl, with a thin sheet of copper adhered to a backing sheet to give it some mechanical strength. With the cutting pressure of the Cameo dialed back, the circuit is cut out of the copper but not the sheet underneath, and the excess can be carefully peeled away.
Using transfer paper, [Heliox] then lifts the copper traces off the sheet and sticks them down to a cut piece of glass. Once it’s been smoothed out and pushed down, she pulls the transfer paper off and the copper is left behind.
From there, it’s just a matter of soldering on the SMD components. To make it a little safer to handle she wet sands the edges of the glass to round them off, but it’s still glass, so we wouldn’t recommend this construction for anything heavy duty. While it might not be the ideal choice for your next build, it certainly does looks fantastic when mounted in a stand and blinking away like [Heliox] shows off at the end.
Ironically, when compared to some of the other methods of making professional looking PCBs at home that we’ve seen over the years, this one might actually be one of the easiest. Who knew?
[Thanks to James for the tip.]
Source:: Hackaday

