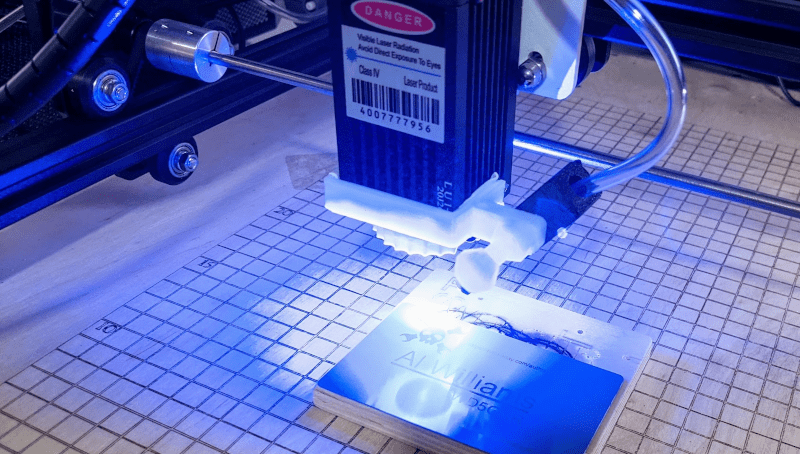
Last month in my hands-on review of the Ortur Laser I hinted that I had done a few things to make it work a little better. I made three significant changes in particular: I anchored the machine to a spoil board with markings, I added a moving Z axis to adjust focus by moving the entire laser head, and I added an air assist.
Turns out, you can find designs for all of these things all over the Internet and I did, in fact, use other people’s designs. The problem is the designs often conflict with one another or don’t exactly work for your setup. So what I’ll tell you about is the combination that worked for me and what I had to do to get it all working together. The air assist is going to take a post all by itself, but some of the attempts at air assist led to some of the other changes I made, so we’ll talk about it some in this post, as well.
One of the modifications — the spoil board mount — I simply downloaded and the link for that is below. However, I modified the moving Z axis and air assist parts and you can find my very simple modifications on Thingiverse. You’ll also find links to the original designs and you’ll need them for extra parts and instructions, too.
Spoil Board
A spoil board protects the bed of the machine by using an inexpensive, replaceable material as a sacrificial surface when the laser passes through your workpiece. One easy addition is to grab a 2 foot square piece of plywood, attach the laser to it, and then use it to engrave a grid pattern. There are plenty around or you can make your own and everyone seems to have slightly different favorites. The one I used was from one of the Facebook groups, but if you look around, you’ll find something you like.
Instead of cutting from a full sheet, I just bought the square of plywood the right size. The big box stores sell project panels that are 2×2 or 2×4 and they are easier to haul in my two-seater or even on the motorcycle. You’ll eventually make some cuts through to the board so you’ll eventually want to replace it, so maybe buy a couple of panels while you are at it.
There’s only one problem. For the grid to make any sense, the laser has to be in the exact same position every time. So it makes sense to attach the laser to the board. I printed some feet from [diy3Dtech]. I liked them because they hold the machine steady but you can just lift it out if you want to put it somewhere else. Problem solved.
Source:: Hackaday

